What is Facebook Business Extension [Order Food Button]?
Basically, it is a bridge that connects your Zyda online store with your social media accounts [Instagram - Facebook].
 "Order Food" button is one of the most powerful tools offered by Zyda, especially for restaurants and cafés. This feature plays a key role in enhancing the customer experience and increasing the efficiency of order processing. Its top benefits include:
✅ Fast and Easy Ordering
Customers can easily visit your website & place orders directly by clicking on "Order Food" button.
✅ Professional User Experience
Offers a smooth and convenient experience that encourages customers to order repeatedly from your online store.
✅ Unique Ordering Experience Under Your Own Brand
Requirements:
- Have ownership over the Facebook page, Instagram page.
- Have a Facebook Business Manager account with the Facebook and Instagram pages connected to them.
Follow this guide on Facebook if you face any issues - Have access level of Manager or Owner on Zyda's dashboard.
- Your store's currency is within the list of supported currencies on Facebook
How to set up Business Extension (Order Food Button)
Note
- If you have a custom domain linked to Zyda the Order Food button will be connected to that custom domain.
- If you don't have a custom domain, the Order Food button will connect to the store's orderfast domain provided by Zyda.
 Before connecting, how can I know which URL will be used [Custom Domain or Orderfast Domain]?
⏩ Check the Visit Store URL on Zyda's dashboard and that's the one that will be used.
There are 3 ways to connect [Order Food Button]
1- From [Instagram]
2- From Zyda's dashboard
3- From [Meta Business Account] - Check this article to know How to connect [Order Food Button] through Meta
How to connect from [Instagram]
1- Click on "Edit profile"
2- Add "Action buttons"3- Select "Order food" option
4- You'll see a list of supported partners. Select [Zyda] and it will you take you to Zyda's dashboard login
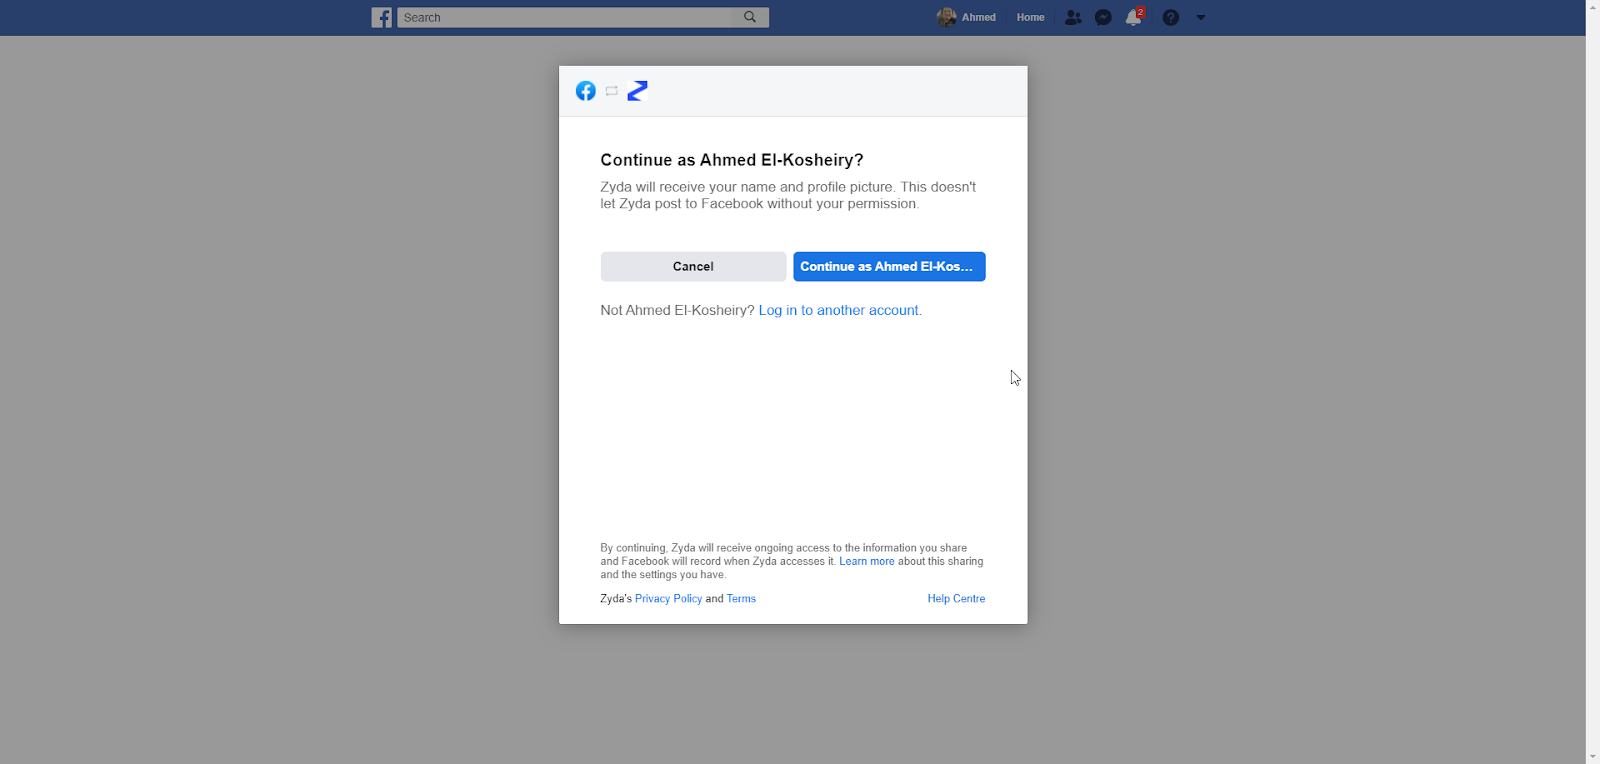
5- Login with your Zyda's dashboard credentials [Email & Password]
6- Click on "Continue as store name"
7- Done. Now set up [Order Food Button] ✅
How to connect from [Zyda's] dashboard
1- Open Zyda's dashboard [dash.zyda.com]
2- Go to "Marketing" tab and click >> "Connect" next to Facebook Business Manager

3- Facebook page will load automatically >> click "Continue"
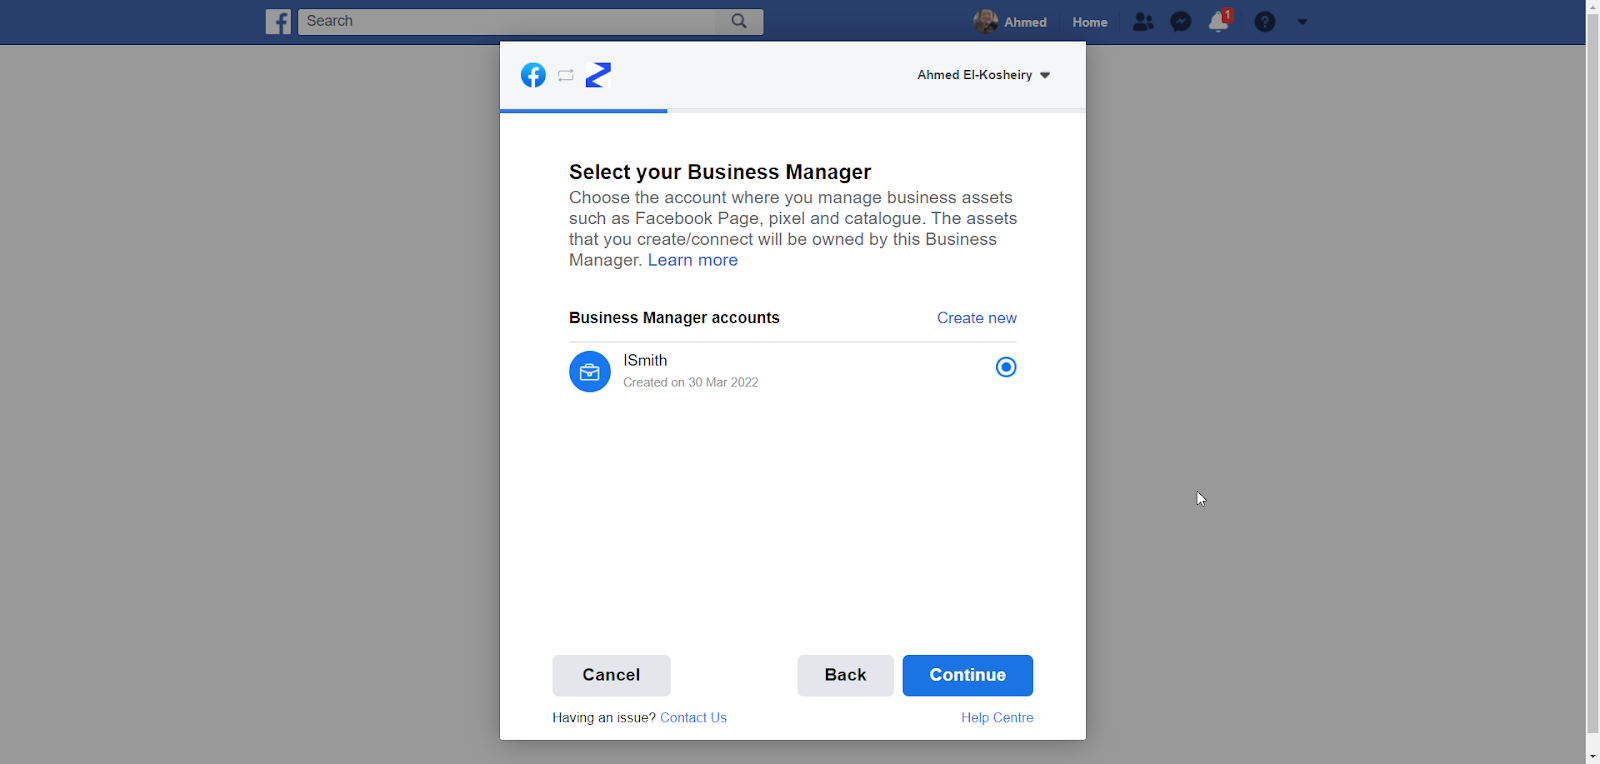
4- Choose your business manager account from the list, usually there will be only one account, then click "Continue". If you do not have one, you can click "Create New"
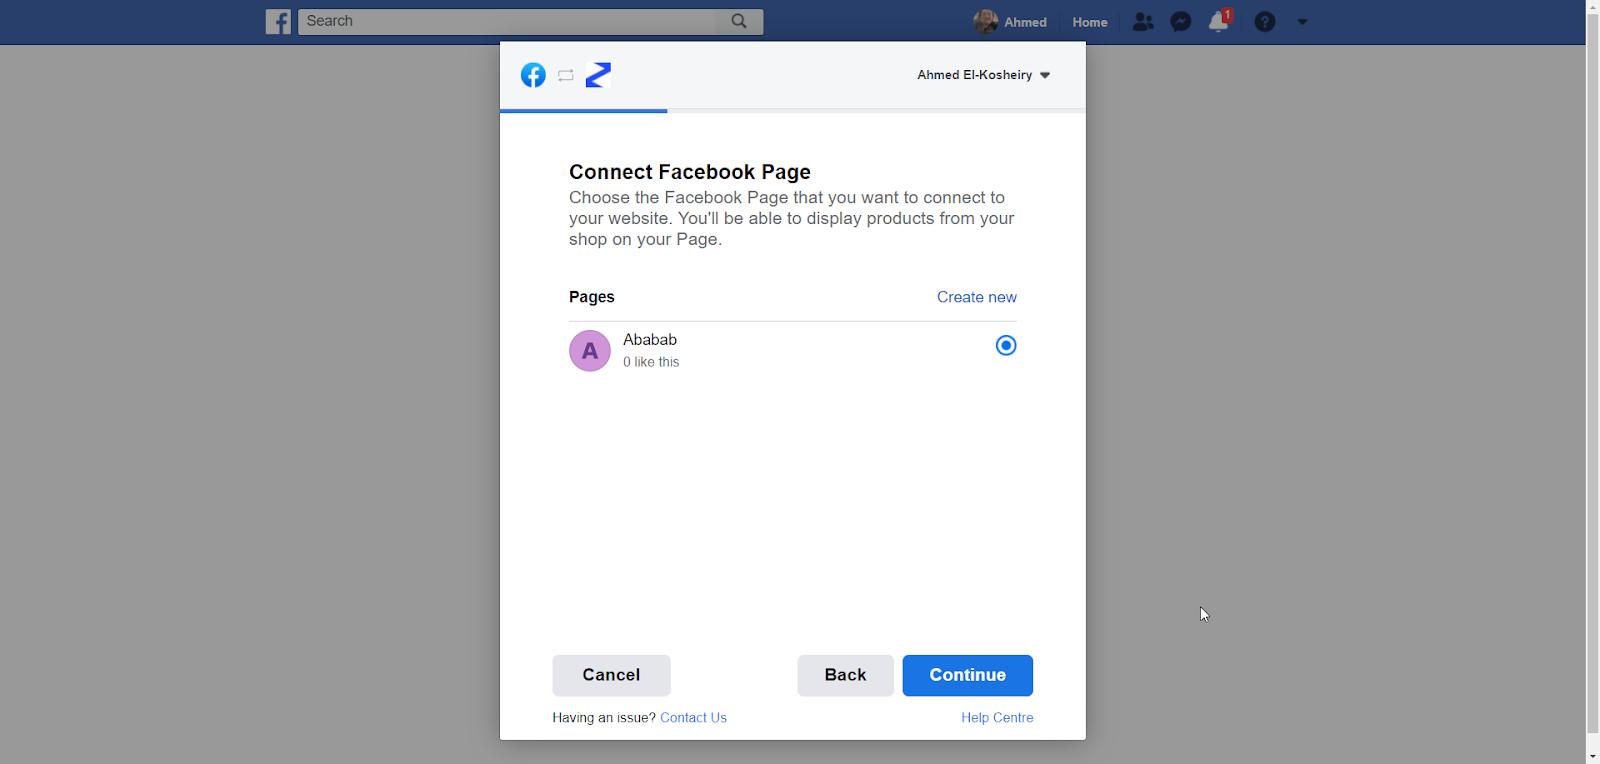
5- Choose your Facebook business page from the list, then click "Continue". If you do not have one, you can click "Create New".
6- Choose your Instagram business profile from the list, then click "Continue". If you do not have one, you can click "Create New".

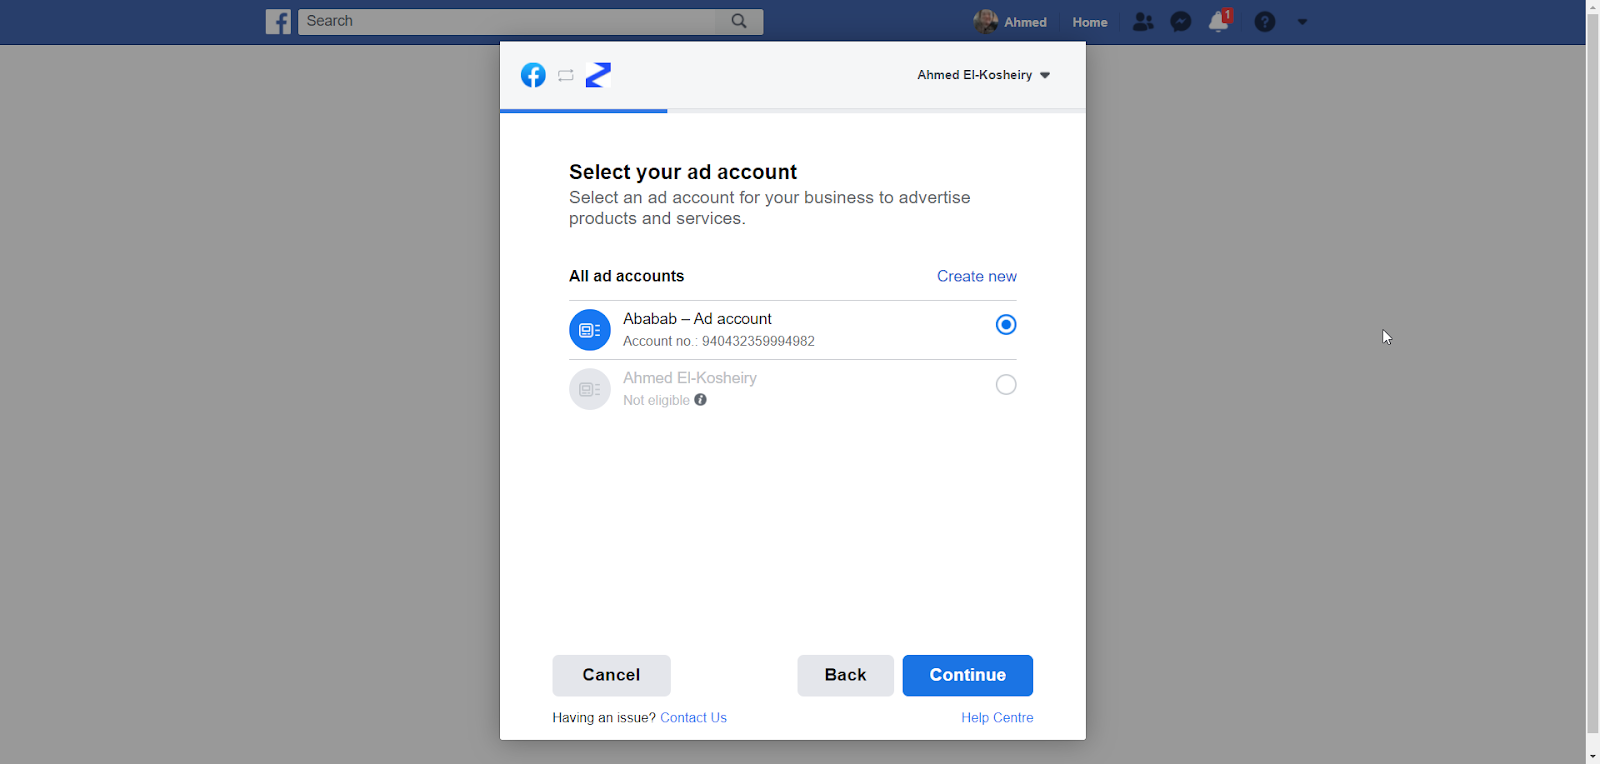
7- Choose your ad account from the list, then click "Continue". If you do not have one, you can click "Create New".
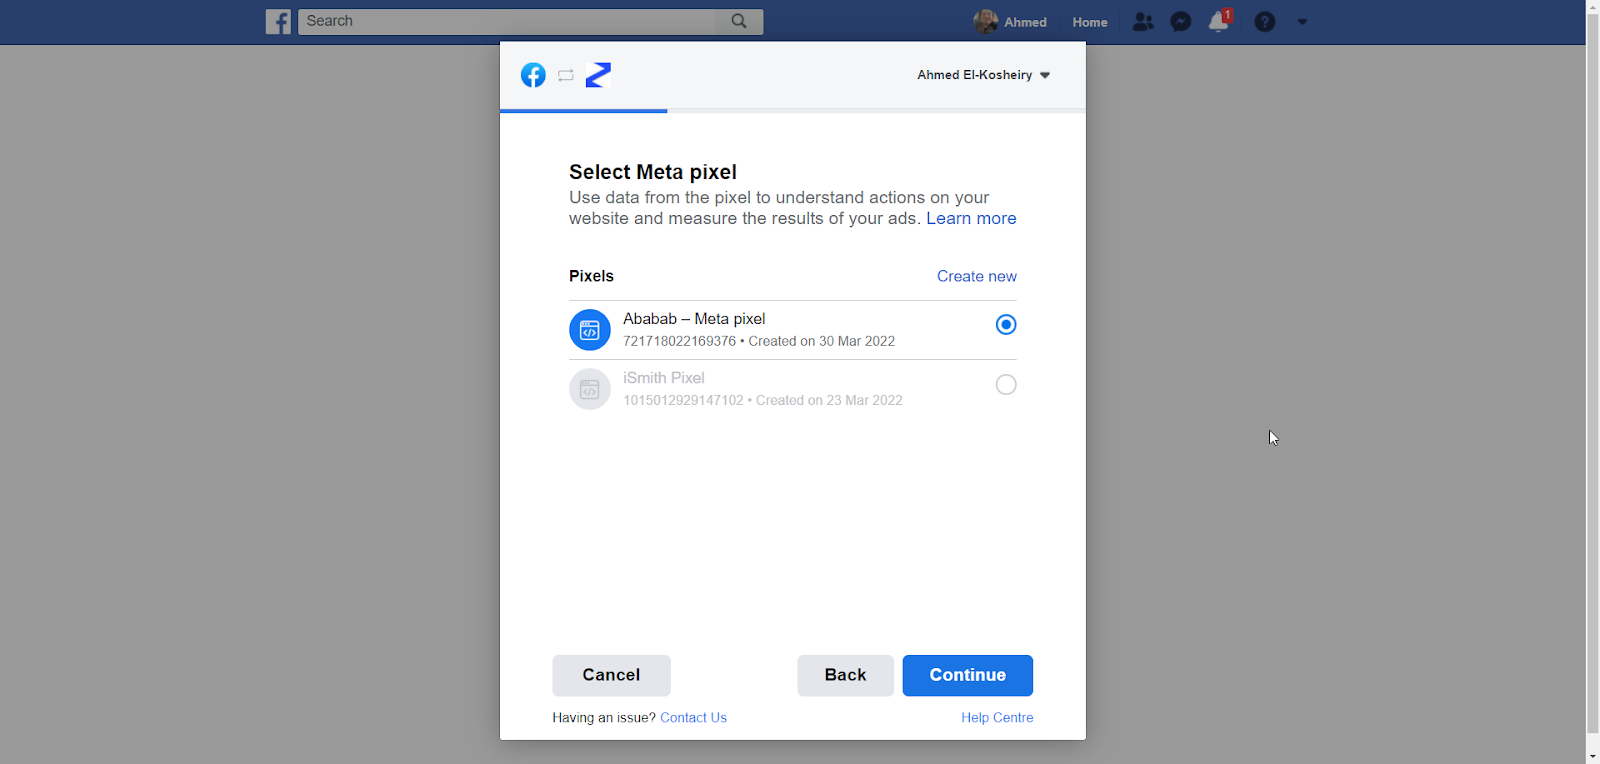
8- Choose your Meta Pixel from the list, then click "Continue". If you do not have one, you can click "Create New".
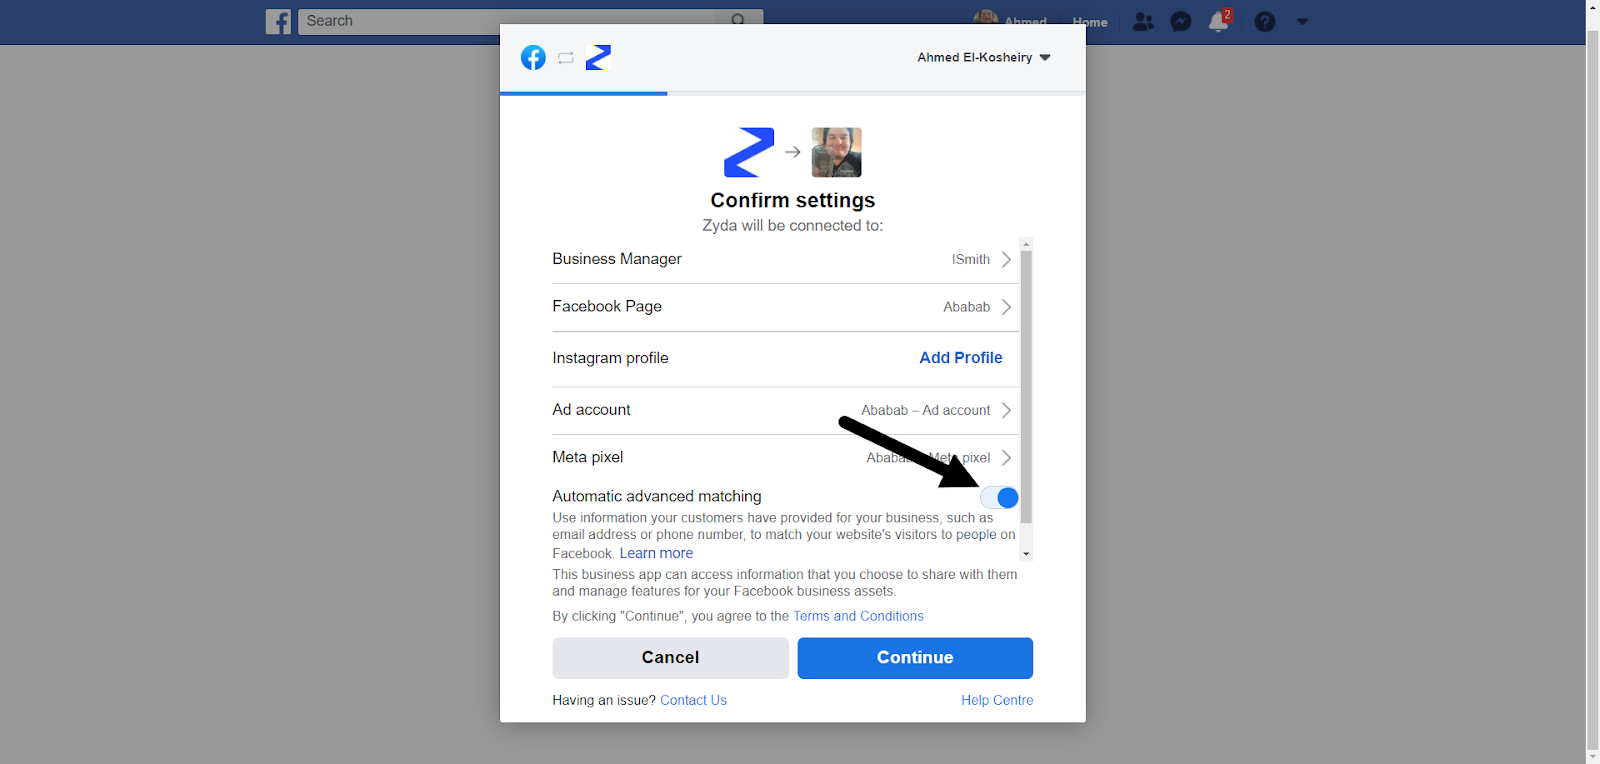
9- Review your choices and "turn on" Automatic advanced matching, then click "Continue".
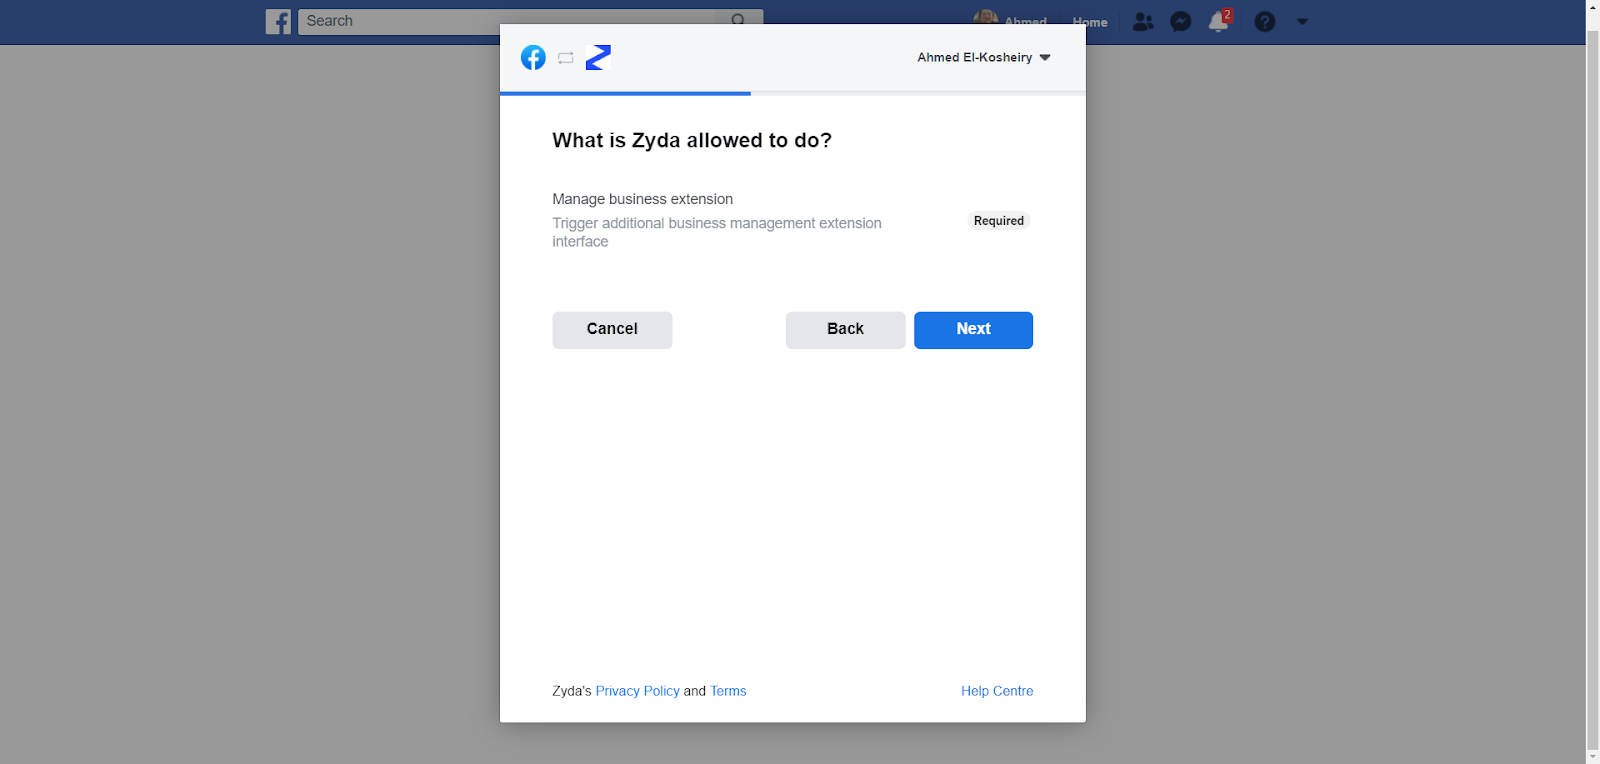
10- Approve that Zyda manages the business extension, then click "Next".
11- A confirmation message will appear. Click "Done" and you are all set!

I am connected, now what?
The first thing you will notice is having the "Order Food" button on Instagram and Facebook to make it easier for your customers to visit and order from your website, increase your sales and strengthen your online presence, so make sure the button is one of the top-reviewed buttons.
